crafts

Ornaments Christmas Wreath


Christmas season is here! What a perfect season to make crafts. I’m puertorrican and in Puerto Rico the Christmas tree, the lights and decorations are up before Thanksgiving Day. I’m no exception.

I have seen these beautiful Christmas wreaths made with ornaments to hang in the front door and I immediately felt in love with them. The only problem is that the price is high. Cost varies from $35 and up. 

So, I decided to make one myself and the best part is that it only cost me $10. Another advantage is that you can make it the color you want and with the decorations you want. 

It cost me $10 because I bought all the supplies in the Dollar Store. The only disadvantage is that they only have certain colors of ornaments like green, red, silver and gold. That was not a problem because this are the colors I wanted all my decorations.

But, if you want another color it may cost you more (anyway less than buying one already made).

Without more to say, let’s know how to make it.

Supplies Needed:

  • 5 tubes of ornaments (I used 1 tube of the 3″ in red, 1 tube of the 2.5″ in green and 3 tubes of 1.5″ assorted colors)
  • 1 wire wreath
  • Christmas ribbon
  • Christmas garland
  • 2 battery operated Christmas lights 2ft long. (Optional) I used the ones with snowflakes.
  • Paper tape
  • Hot glue gun and lots of glue sticks
  • Big artificial Poinsettia or any other decorations (optional)

Step by Step:

  1. Cover with paper tape the wire wreath all around front and back.
  2. Start gluing the ornaments in the outside border first and then the inside border. Start with the bigger ones, then the medium, etc… Glue them to the wire wreath and together for more support.
  3. After the outside border and the inside border are finished, glue or tape the lights making a circle between both borders. One lights set in the left side and another one on the right.
  4. Glue the battery boxes to the back of the wreath, one on the right side and another one on the left.
  5. Do the same as Step 3 with the garland trying to cover the lights wire and empty spaces.
  6. Cover any hole or empty space with the more smallest ornaments. 
  7. Tie a string or a piece of ribbon in the middle highest part of the wreath to hang it in the door. You can use a wreath holder if you like.
  8. Make a big bow with the Christmas ribbon and glue it in the center covering the hanger string.
  9. Glue the Poinsettia or any other decoration you want and hang it in the door.

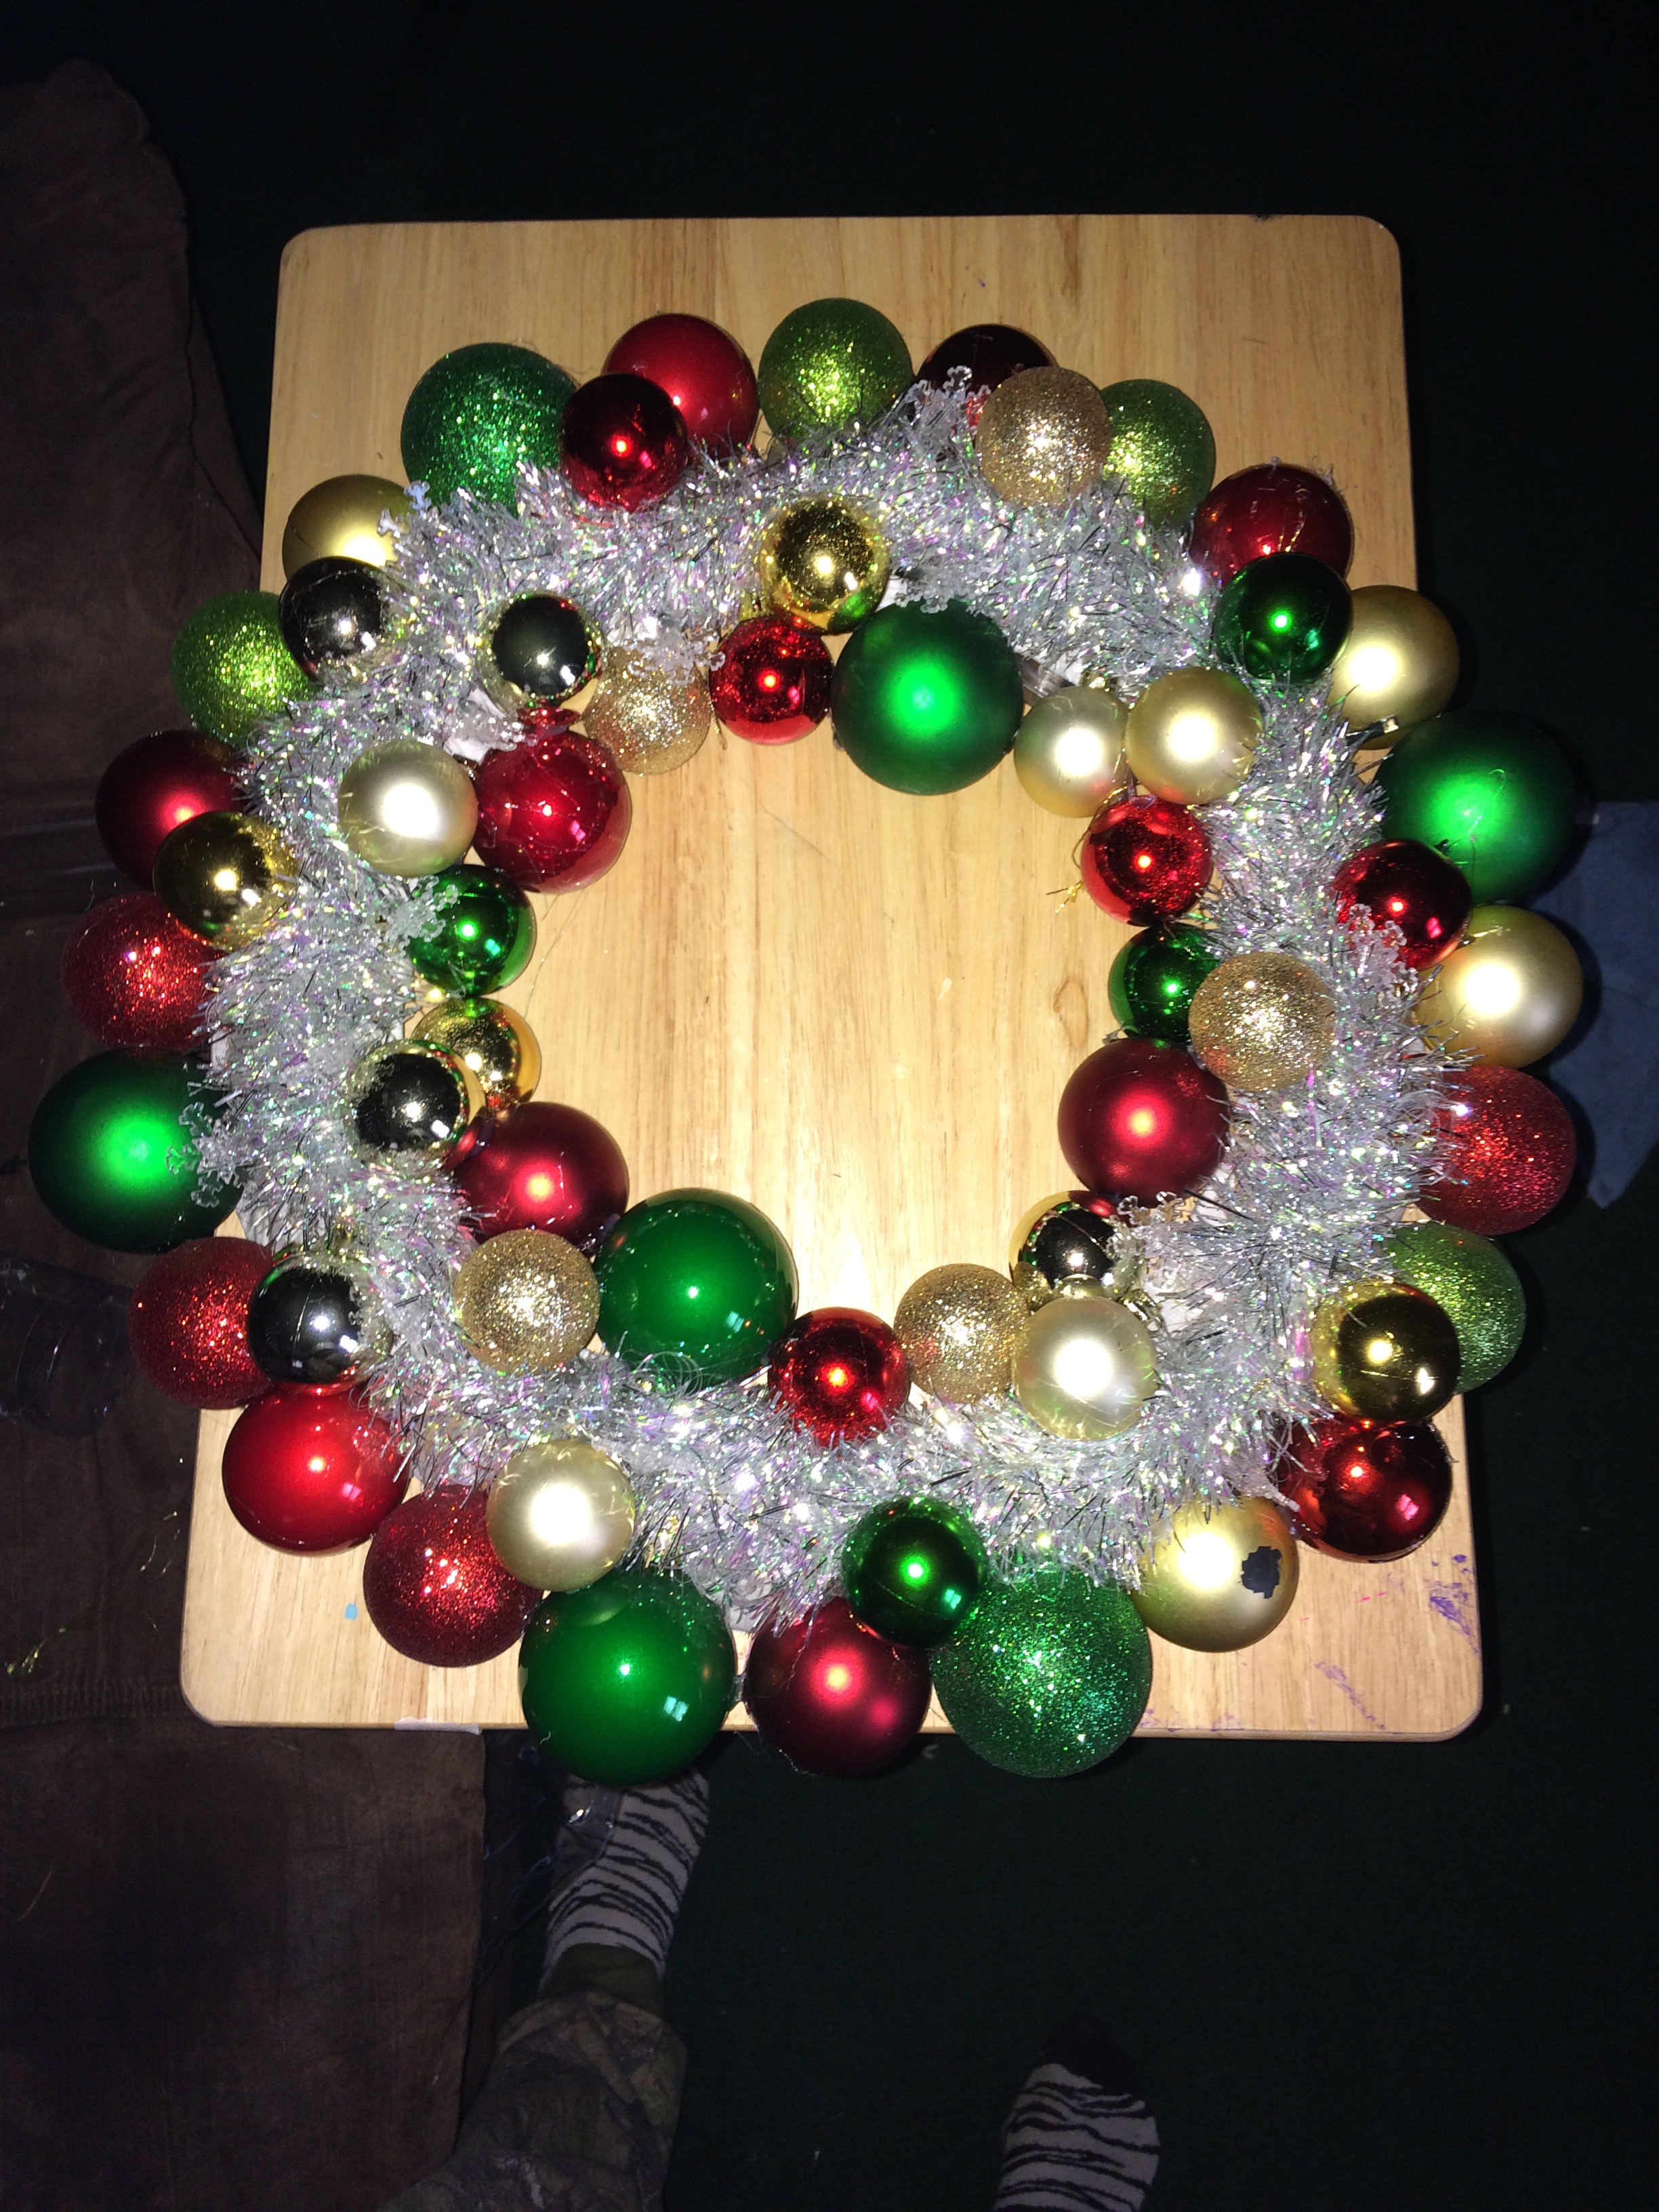
Now you have a DIY Christmas Wreath that cost less than buying it already made. The best part is that when someone come to visit and tells you how beautiful it is, you can be proud to say “I made it!”. Probably, they won’t believe you but it is a priceless feeling. 


Hope you liked this post and remember to comment and share with your friends.

Stay tuned for more DIY Christmas Decorations.

Standard
crafts

Vinyl Kitchen Aid Cover

Recently, one afternoon, my husband came home from work with a gift for me. My always wanted 1st Kitchen Aid. I love crafts but I also love baking, and that useful tool that is the dream of every bake lover was top #1 in my Wish list. My adorable husband knowing that found a good deal in a new Kitchen Aid and decide to surprise me. 

After I take it out of the box and watch it, and test it; I realized that I needed a cover to protect it from dust and everything else. So I decided to go the other day to a craft store to buy some fabric to make it a cover. I don’t have a sewing Machine so I have to do it all by hand. I went to Joann and bought a yard of  vinyl (just used exactly half yard) and a sheet of felter and started the work at home. I download a pattern for the front and back from internet but needed to add more inches because it was too small. But, i think you don’t even need a pattern, if you do, there are some in the internet. Basically you just need a U shape with the meassures I’m going to give you. Let’s begin…

Materials:

  • 1/2 yard vinyl 20 gauge clear
  • Felter (color desired)
  • Needle and thread (or sewing machine)
  • Ruler or meassure tape
  • Scissors
  • Pencil
  • Pins

Instructions:

  1. Downloand and print or make your own pattern for the front and back of your cover. Must be U shaped and meassure 15″ high and 10″ wide. Trace the pattern in the vinyl with the pencil and cut it. You must make two of these.
  2. Cut a large rectangle of vinyl that should meassure 35″ long and 16″ wide. Now, you should have two 16″x 10″ U shaped pieces and one 35″ x 16″ large rectangle. 
  3. Fold the U shapes in half upside down and mark the center of each one (the half should be 5″ in the round side of the U shapes). Do the same with the rectangle in the side that meassure 35″ bend in half and mark it (the half should be 15 1/2″).
  4. Align the middle of one U upside down with the middle of one long side of the rectangle. Put some pins on it and all the way around. Sew it together with needle and thread or your sewing machine.
  5. Cut a 6″x 6″ vinyl square to make a side envelope to put your instructions manual. Secure it with pins in the place you want (I put it in the right side) and sew it together.
  6. Repeat step 4 with the other U shaped side. And you will end with this…
  7. Cut felter strips 1″ wide and glue it to the ends to cover the sewed area.
  8. Optional: cut a vinyl strip 1″ wide x 5″ long and sew it at the top of the cover to make a handle. Decorate as you like. 

Now, you have a cover to protect your Kitchen Aid from dust, water, etc… You can make a cover like this for all your kitchen machines, just meassure the machine you want to cover and make it!


Hope you like this post and don’t forget to comment and share opinions.

Standard
crafts

Wonder Woman Tiara, Bracelets, Belt & Boot Covers

This last months had been really busy for me with all the parties, crafts and orders. Because of that I didn’t have the chance to buy or make me a costume for Halloween Day.

One day walking in a store looking for some material for a cake, I found a Wonder Woman caped shirt and I felt I had to buy it. At least I would have something to wear for Halloween. I also bought a Deadpool jacket for my husband, and my daughter already had her Elsa costume that she wanted to wear for the 100th time lol. 


Anyway… After buying that Wonder Woman shirt, I felt that I needed some accesories, so I research some ideas, but they were difficult and expensive. So, I got the idea, but used other materials. The best part is that it took me less than 1/2 and hour to make them. The idea was to make just the tiara and bracelets, but I ended up doing the belt and boot covers too!

Now, let’s see how to make them.

Materials:

  • Gold glittered foami (bought at Joann)
  • Red cardstock, paper or felter to make the stars (used a piece of red paper I had)
  • Hot glue gun and sticks
  • Velcro circles (found them at Dollar Tree Store)
  • Ribbon or Elastic
  • Ruler
  • Scissors
  • Exacto knife

    Steps: 

    1. For the Tiara: you can download and print a stencil from the internet. I just made a stencil with carboard. I made it 27 1/2 cm long 7 1/2 cm high in the center and 2 cm high on sides. This varies depending on your measurements. Trace the stencil in the back of the foami and cut it with scissors. Make a little hole in each side of the tiara and pass a ribbon or elastic through it, cut a piece of foami and cover it in the front. I used some spiral thing that I had from a foami hat.
    2. For the bracelets: cut two rectangular pieces of 20 1/2 cm x 8 1/2 cm. Glue two velcro dots in one side and 2 in the front side to close it. Again the measures varies depending on your wrist size.
    3. For the Boot Covers: cut two more pieces like the one used for the tiara. Use the same stencil. Cut one little hole in each corner and pass a elastic through it. Glu it and cover with a little piece of foami.
    4. For the Belt: cut a W shape out of foami. I bent the foami in half and cut a V shape then open it. Cut 2 1/2 cm wide strips out of foami until you reach your wais size. Glue each strip to the other forming a belt. Glue the W shape to one corner of the belt, then glue some velcro dots to close it.
    5. Trace and cut 3 star shapes from the red cardstock, paper or felter. About 3 cm each. Glue one to the center of the tiara and the other two to the bracelets.

    Now you have some cheap and easy to make Wonder Woman accesories. Hope you liked this post. Don’t forget to comment and share this post. 

    Here with them on…

    Standard